what size shed to build for a portable generator
I went ahead and bought a second portable generator (CAT 7500) so I am stuck having 2 portable generators sitting in my garage (instead of my car). With winter approaching, I definitely desire my machine dorsum in the garage so I need to come up upwardly with a storage solution.
One of the nearly popular way of storing portable generators was to re-purpose a plastic tool storage shed. Because it was relatively inexpensive and quick to assemble (and it looked like a standby generator when done), I saw tons of people going wit this method (you can read my Lifetime Horizontal Shed review here).
Some other large segment of people constructed their own wood mini sheds but zero really captured all the featured I wanted so I decided to just build my ain.
I used to store and run my generator in a semi-covered corner on my deck. It worked well during Hurricane Sandy simply the exposed sides were pretty harsh on my generator
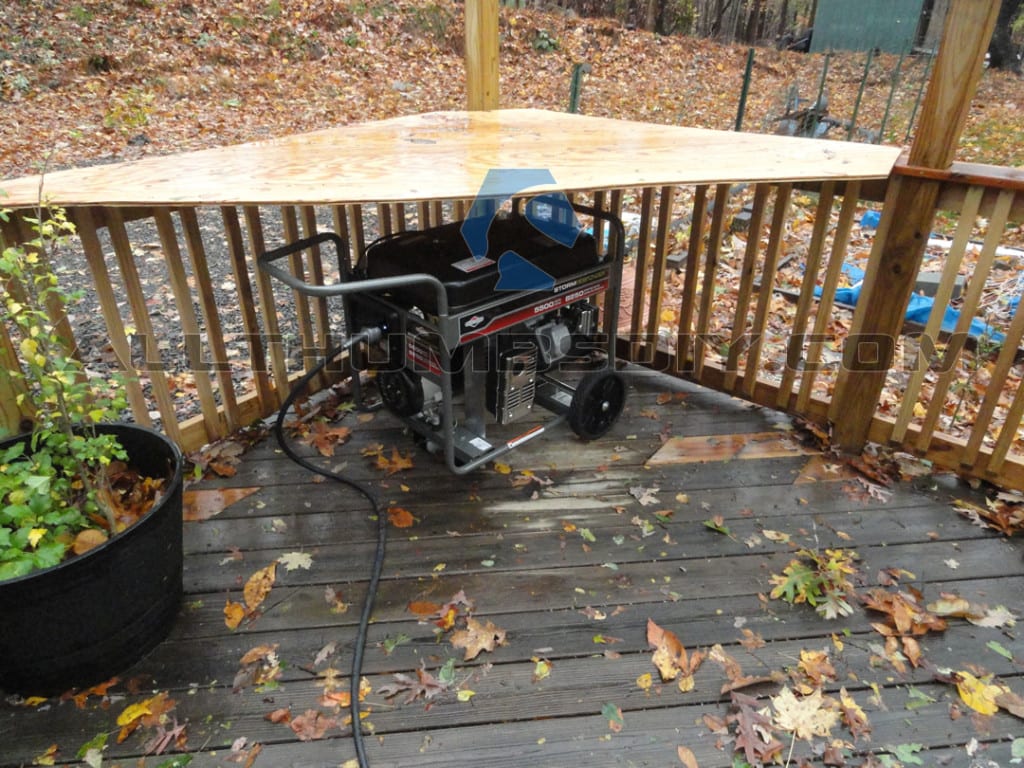
Table of Contents
- Feature Wish listing
- Edifice base of operations
- Framing the Platform
- Framing the Walls / Roof
- Siding (coming soon)
- Roofing (coming soon)
- Rut Control (coming soon)
- Audio Control (coming shortly)
- Refueling Safety (coming soon)
Portable Generator Shed Features – Wish list
I probably can't satisfy them all but hither is my wish list:
- Fire safety;
- Located on a high, dry out ground to minimize water/wet damage;
- Low center of gravity (to reduce the risk of tipping over during high-current of air situations);
- Effective rut control;
- Minimize sound while running the generator;
- In-place service accessibility;
- Minimize water contamination during re-fueling;
JUMP TO THE TOP
Edifice Base Choices
There are many options just it basically breaks downwards into 4 choices:
- Option # 1 – Place the generator shed on dirt or grass (directly contact). This is the easiest method where a shed sits on a pair of PT 4x4s. I adopt a location with plenty of ventilation and drainage, neither of which are provided past packed soil. Plus, packed soil can pool water during heavy down pour and I definitely dobn't want to stand up in information technology while working on a generator;
- Option # 3 – Place the generator shed on gravel;Situating a structure on gravel prevents direct contact with water due to drainage besides as allow ventilation underside, potentially reducing the risk of rot.
- Option # 4 – Place the generator shed on a concrete pad;This is the best option if your upkeep tin can support it and you know you will exist living in your house long-term.
TIP: CONCRETE PAD
In my stance, any not-commercial portable generator should sit down on top of a concrete pad consisting of:
- 4,000 psi mix;
- Thickness should be approximately 6-8 inches thick;
- Supported past either mesh or re-bar support that is centered during physical pour;
Also, keep in heed that transporting concrete sacks, mixing and installing steps are all back breaking tasks! Although the price may exist about 100 bucks higher, you may want to consider subbing information technology out to a brusk load concrete seller (if you live in NJ, you tin can telephone call these guys – https://www.shortloadconcretellc.com/price-listing ; I used them for my deck projection and they were crawly) would have charged $220 + revenue enhancement (including delivery).
Although I liked the concrete pad thought, I wasn't sure I would keep my generator in this particular location long term. Then the thought of possibly moving a ane,500 lbs physical pad (that's how much it would weigh when creating a 6 ft length ten 4 ft width x 8 in deep base of operations) or .41 cubic yards of concrete (Sakrete has a bully estimator – http://www.sakrete.com/product-calculators ), didn't sound too appetizing.
Jump TO THE TOP
Footing PREP
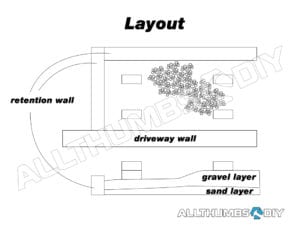
What I decided was to create a landing pad consisting of packed sand and three/4″ driveway gravel to ensure level ground that will drain away h2o. I created a similar setup with my commencement shed (link here to read my commodity) with skilful success.
- STEP # one – The original location was on the corner of the deck so I decided to re-purpose the sometime sandbox play area which was direct adjacent to information technology;
- STEP # 2 – Remove sand (top layer) from the sandbox;
- Step # iii – Remove gravel (lesser layer) from the sandbox;
- Footstep # iv – Remove redwood sandbox frame;
- STEP # 5 – Clear debris;
- STEP # half dozen – Mark eight ft ten seven ft area with wood stakes / re-bar stakes;
- STEP # 7 – Remove rocks and do a rough immigration to level the basis;
- Pace # 8 – Lay downwardly landscaping cloth (to preclude weeds from growing underneath);
- Step # ix – Lay downwardly sand; tamper down; cheque level using 6 ft level;
- Stride # ten – Lay downwards a second layer of landscaping textile;
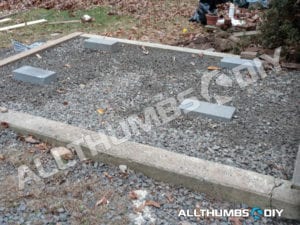
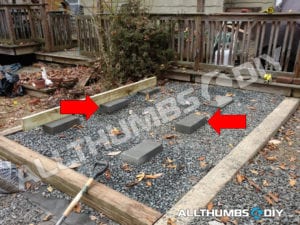
- Step # 11 – Identify ii physical footing blocks on each corner;
- Footstep # 12 – Place 4 concrete footing blocks (2 stacked per corner) on each corner; 2 stacked concrete blocks are required due to peak; employ construction adhesive to bail two physical blocks together;
- STEP # thirteen – Lay downward approximately vi inches of gravel and tamper down;
JUMP TO THE TOP
FRAMING THE Floor PLATFORM
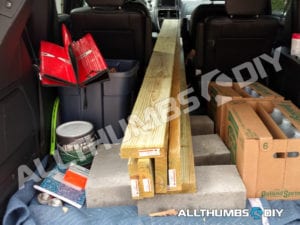
One slight change from yesterday's work is that I added two more than concrete blocks in the center of the frame to requite it fleck more than stability. And using my awesome Contrivance Grand Caravan, I lugged some 2x6x8 PR lumber.
With the gravel landing pad completed, I moved on to amalgam the foundation.
- Pace # i – Position two, 2x6x8s and two, 2x6x4s on a rectangular shape and spiral them in;
- STEP # two – Adhere ane center beam in the center of the rectangle than measure to verify that the rectangle is foursquare;
- STEP # iii – Attach additional floor joists, 16″ O.C.;
- Footstep # 4 – Install joist blocking between floor joists;
- STEP # 5 – Spiral down 3/four″ iv×8 PT plywood;
Leap TO THE TOP
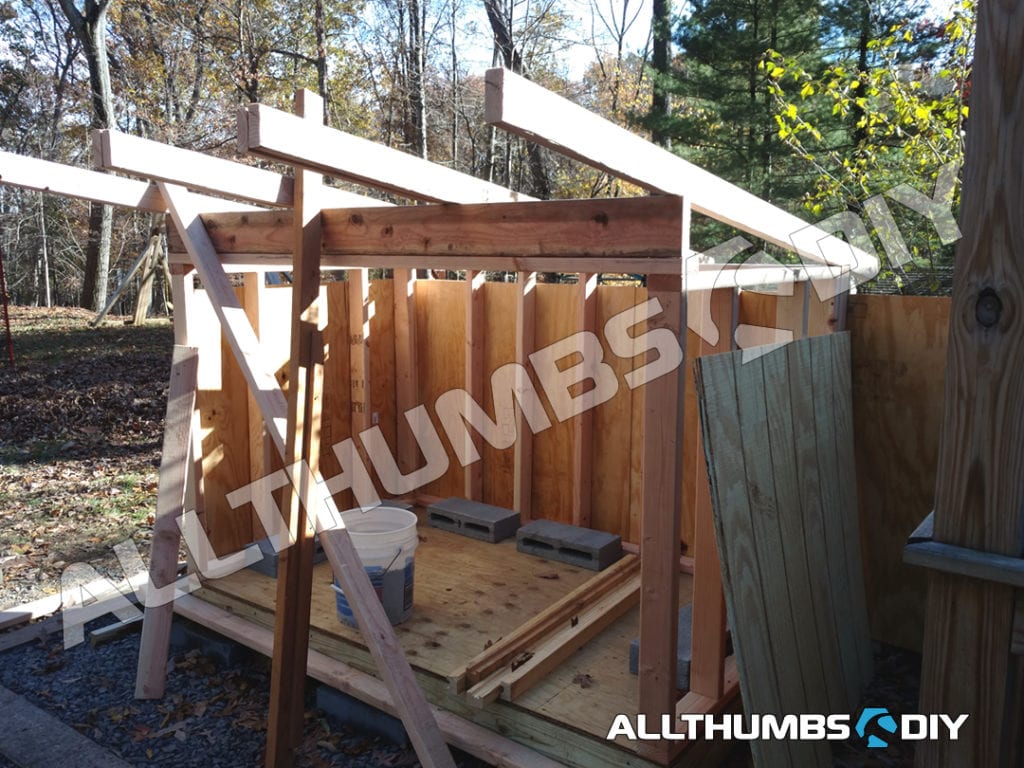
FRAMING WALLS
With base padding consummate, time to head over to Abode Depot for lumber to install walls and roof rafters (and picked upwards some T11 sidings as well);
- STEP # i – Much like base framing, I follow the same blueprint except this time, I employ 2 10 4s to create the back wall;
- Pace # ii – Side walls will non be supporting any weight then the space between two studs were made them wider to anticipate installing an intake fan at the end;
- STEP # 3 – I installed 2 x 4 on its side, then a two x6 header to back up the rafters;
- STEP # iv – Because the footprint was fairly pocket-size, I decided to go with 2 ten 4 rafters with bird-mouth cuts
JUMP TO THE TOP
FINAL WORDS
I will exist posting updates every bit I progress through the generator shed project.
If you found this article to be useful, tin you exercise me a favor and sign up for my newsletter and then that I can send yous updates on my DIY projects?
Lastly, if you lot have any questions, please leave a comment below.
Thank you and good luck with your DIY project!

REFERENCES
- generator shed
- generator shelter
- generator shelter plan
- generator shelter diy
- generator shelter kit
- generator shed lowes
- generator shed suncast
- generator shed design
- generator shed soundproof
- generator shed exhaust fan
- generator shed fan
- small generator shed
- outdoor generator shed
Reader Interactions
Source: https://allthumbsdiy.com/building/building-a-custom-portable-generator-shed
0 Response to "what size shed to build for a portable generator"
Postar um comentário